
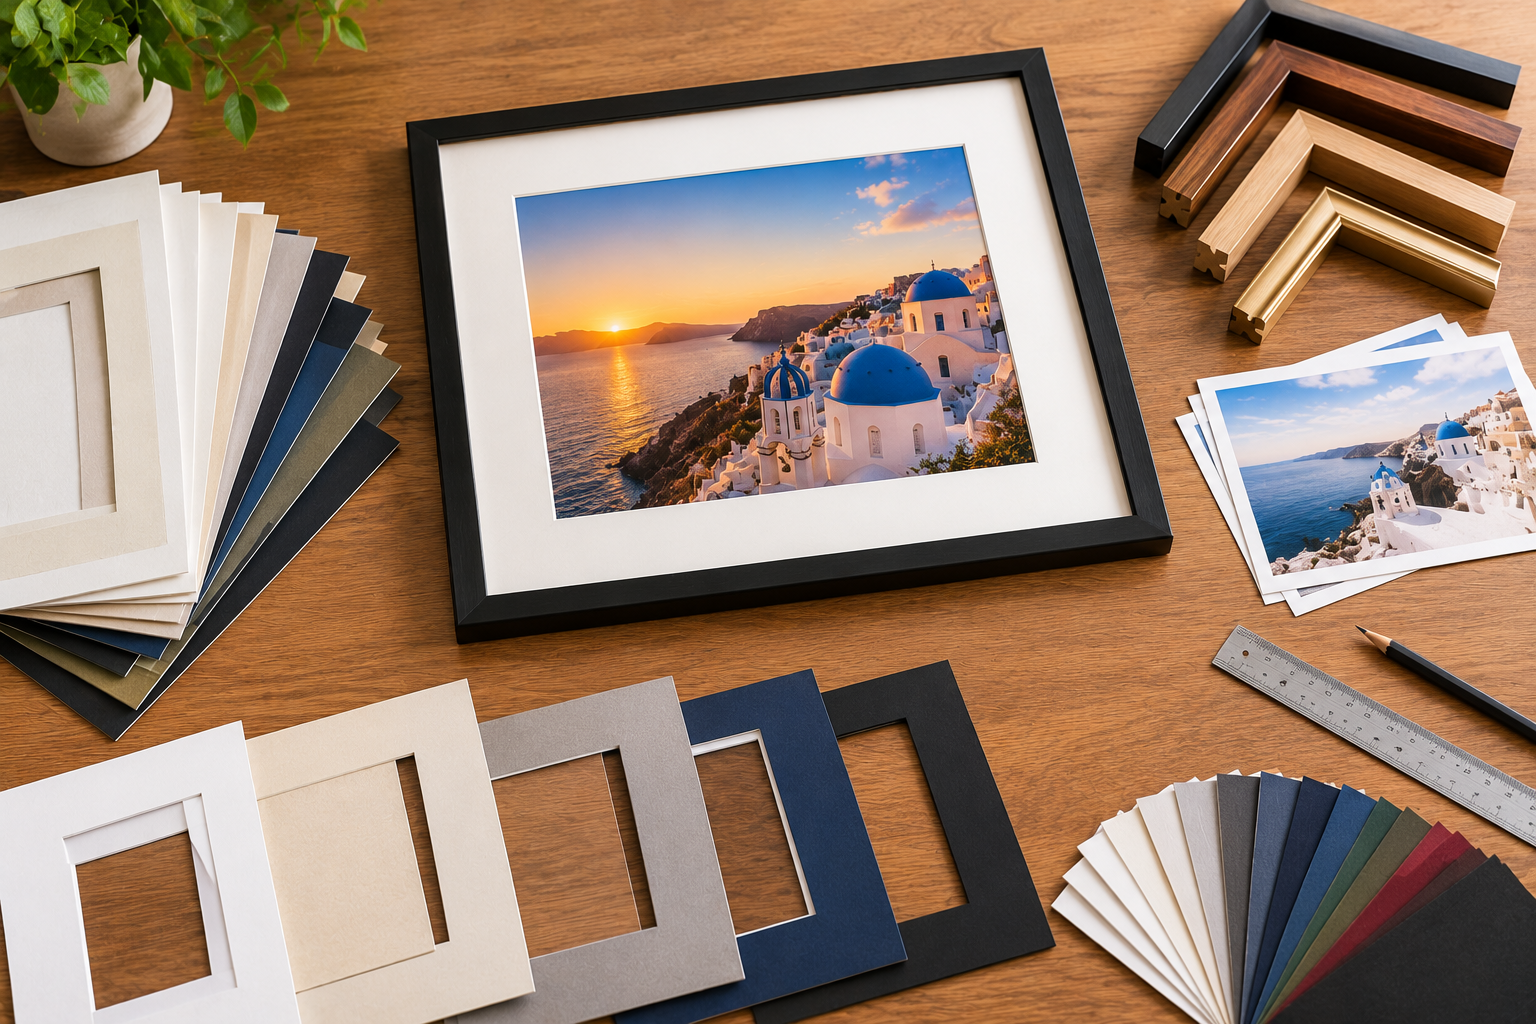
For most photos, choose a mat that is 2 to 3 inches (50 to 75 mm) wide on every side. Use about 1.5 to 2 inches for small prints such as 4x6 and 5x7, 2 to 3 inches for mid-size prints such as 8x10 to 11x14, and 3 to 4 inches for large prints of 16x20 and above. Many framers also make the bottom border slightly wider than the top and sides, which gives a balanced, professional look.
That is the quick answer, but the best mat size depends on your photo, your frame and your wall. If you are planning photo framing in Dubai, this guide shows you how to pick the right width, how to calculate the opening, and which mistakes to avoid.
A mat is the card border between your photo and the frame. It looks like a small detail, yet it changes how the whole piece feels. A mat that is too thin makes a photo look cramped. One that is too wide can swallow a small print. Get it right, and even a simple snapshot looks like a gallery piece. Whether you visit a studio or use online photo framing, understanding mat size helps you order with confidence.
Mat Size Chart: Recommended Width by Photo Size
Use this table as a starting point. Widths are per side, and the outer mat size is the photo size plus the border on both sides. Treat the figures as guidelines, not strict rules.
|
Photo size |
Recommended mat width |
Approximate outer mat size |
|
4x6 in (10x15 cm) |
1.5 in (38 mm) |
7x9 in |
|
5x7 in (13x18 cm) |
2 in (50 mm) |
9x11 in |
|
8x10 in (20x25 cm) |
2 to 2.5 in (50 to 63 mm) |
12x14 to 13x15 in |
|
A4 (21x29.7 cm) |
2.5 in (63 mm) |
about 34x42 cm |
|
11x14 in (28x36 cm) |
2.5 to 3 in (63 to 75 mm) |
16x19 to 17x20 in |
|
A3 (29.7x42 cm) |
3 in (75 mm) |
about 45x57 cm |
|
16x20 in (40x50 cm) |
3 in (75 mm) |
22x26 in |
|
24x36 in (60x90 cm) |
3.5 to 4 in (90 to 100 mm) |
31x43 to 32x44 in |
If your photo is a panorama or an unusual shape, ask a framer to calculate the border for you, because the long and short sides may need different treatment.
What a Mat Does and Why Size Matters
A mat, also called a mount or passe-partout, does two jobs at once: it protects the photo and it improves how the photo looks.
• Protection. The mat holds the print away from the glass. In Dubai's humid climate, a print that touches glass can stick to it or develop moisture marks. A mat creates the air gap that prevents this.
• Focus. White space around an image rests the eye and draws attention to the subject, the same way a gallery wall does.
• Proportion. The mat links the photo to the frame. It lets a small print fill a larger frame without looking lost.
• Flexibility. A mat lets you use a standard frame for a non-standard photo, or give a wedding portrait a more formal presence.
The size of the border matters because it controls balance. Too narrow, and the picture feels crowded against the frame. Too wide, and the frame looks empty and the photo looks small. This is one reason custom framing in Dubai is popular: a framer can set the border to suit your exact photo, rather than forcing it into a pre-cut standard mat.
How to Calculate Your Mat Size, Step by Step
You do not need special tools to work this out. Follow these five steps.
1. Measure your photo. Write down the width and height of the print. For an 8x10 inch photo, that is 8 in by 10 in.
2. Decide the border width. Pick a width from the size chart above, for example 2.5 in for an 8x10.
3. Work out the window opening. The mat should overlap the photo by about 0.25 in (6 mm) on each side so the edges stay hidden and the print cannot slip out. Subtract 0.5 in from both the width and the height. An 8x10 photo gets a 7.5 x 9.5 in opening.
4. Add the border to the opening. Add the border width twice to each dimension. The visible window of 7.5 x 9.5 in plus 2.5 in on each side gives a mat board of 12.5 x 14.5 in.
5. Match the frame. The frame must fit the outer mat size. If 12.5 x 14.5 in is not a standard frame size, a custom frame is the cleanest solution.
This is also why the outer sizes in the chart above are approximate: the overlap trims a little from the window, so a framer rounds sizes to suit the frame.
Bottom weighting. Many framers add 5 to 10 percent extra to the bottom border. On the example above, that means a bottom border of about 2.75 in instead of 2.5 in. The extra weight stops the picture looking as if it is sliding down inside the frame.
If you would rather not calculate anything, share your photo size with a framing service and ask for the recommended mat. Most professionals will do the maths for you.
Factors That Change the Right Mat Size
The chart gives a safe default. These factors help you fine-tune it.
Photo size and detail
Small prints usually need narrower borders so they do not look swallowed. Large prints can carry wider borders, which gives them a gallery feel. Busy, detailed images often benefit from extra space to breathe, while simple, bold images can handle a slimmer border.
Frame width and style
A thick, ornate frame is visually heavy, so a wider mat balances it. A slim modern frame pairs well with a moderate mat of 2 to 2.5 inches. If the frame is very wide and the mat is very narrow, the photo can look squeezed.
Wall space and viewing distance
A photo in a hallway is seen up close, so a narrower mat works. A piece above a sofa is seen from across the room, so a wider mat helps it make an impact. In a large Dubai living room with high ceilings, a bigger mat and frame often look better than a small framed print.
Subject and mood
Formal subjects such as wedding portraits and fine-art prints suit wide, generous borders. Casual family snapshots and modern prints can look good with tighter borders. Panoramic skyline photos often work best with a slim, even border that follows the shape of the image.
Gallery walls
For a group of frames, keep the mat width consistent across all of them, or at least within each row. Matching borders make mixed photo sizes look planned. This is where photo framing done in a single order saves time and avoids mismatched sizes.
Single mat or multiple openings
A single mat works for one photo. If you want several small photos in one frame, a multi-opening mat needs enough space between windows, usually 1 to 1.5 inches, so each image has room.
Mat Colour, Thickness and Double Mats
Width is the main decision, but three other choices complete the look.
• Colour. White and off-white are the safest options. They suit most photos and interiors. Warm ivory flatters vintage and black-and-white prints, while a soft grey or black mat adds drama to bold, high-contrast images. Pick a colour already present in the photo if you want a coloured mat, and avoid anything that competes with the subject.
• Thickness. A standard mat is around 1.4 mm thick (often called 4-ply). Thicker boards of about 2.8 mm (8-ply) create a deeper, more dimensional bevel and a premium look, especially on larger pieces.
• Material. Choose acid-free or conservation-grade mat board. Cheaper boards can turn yellow and stain photos over time, a problem made worse by heat and humidity. For valuable or sentimental prints, this is a detail worth paying for.
• Double mats. A second mat, with a thin 0.25 in (6 mm) reveal showing beneath the first, adds depth and a hint of colour. Use a lighter outer mat and a slightly deeper or complementary inner colour.
If you are framing a print that will sit in a bright room, remember that the mat is only one layer of protection. Pair it with UV-filtering glass or acrylic to slow fading, as covered in our guide to which photos deserve professional framing.
7 Common Mat Sizing Mistakes to Avoid
1. Choosing a border that is too narrow. Anything under 1.5 inches on a medium or large print tends to look cramped.
2. Using the same mat for every photo. A border that suits an 8x10 will not suit a 24x36. Scale the mat to the print.
3. Forgetting the overlap. If the window opening is the same size as the photo, the edges show and the print can fall through. Allow about 0.25 in on each side.
4. Ignoring bottom weighting. Perfectly even borders can look as if the picture is sinking. A slightly wider bottom corrects this.
5. Skipping the mat altogether in humid rooms. Without a mat, the print can press against the glass and stick or mark. A mat is a practical safeguard, not just a style choice.
6. Using non-archival board. Low-grade mats can yellow and damage the photo. Always ask whether the mat is acid-free.
7. Choosing the frame first and the mat second. Plan the photo, mat and frame together, since each affects how the others look. Planning them together is the core idea behind custom framing in Dubai.
Getting the Right Mat Size with Custom and Online Framing in Dubai
Ready-made frames come with pre-cut mats in a handful of sizes, and a real photograph rarely fits them exactly. Custom framing in Dubai solves this by cutting the mat and frame to your print, so the border, window and bottom weighting are all set for your specific photo.
Online photo framing in Dubai makes the same result easier to reach. Instead of visiting several shops, you can enter your photo size, choose a frame and mat width, compare finishes and order from home or the office. With online custom framing in Dubai, you also keep full control over details like mat colour, glass type and whether you want a double mat.
At PickFrames, you can design a made-to-measure frame around your photo, choose the mat that suits it and have it prepared with care. Here is a simple way to order:
1. Measure your photo and note the width, height and orientation.
2. Use the size chart in this guide to pick a starting mat width.
3. Choose a frame style that matches your room.
4. Select acid-free mat board and UV-protective glazing for lasting protection.
5. Review your design, then place your order.
If you are unsure, ask the team to recommend a mat size for your photo. A quick check before ordering often saves time and avoids a frame that does not feel quite right.
Conclusion: Choose a Mat That Lets Your Photo Shine
The right mat size is usually 2 to 3 inches wide for mid-size photos, narrower for small prints and wider for large ones, with the bottom border a touch heavier. Adjust for frame style, wall space and mood, and always choose acid-free board so your photo stays clean in Dubai's heat and humidity.
Good photo framing in Dubai comes down to proportion and protection. If you want the numbers worked out for you, explore online photo framing in Dubai and made-to-measure options at PickFrames, and give your favourite photo the border it deserves.
Frequently Asked Questions (FAQ)
What mat size should I choose for my photo?
Choose a mat 2 to 3 inches (50 to 75 mm) wide for most photos. Use about 1.5 to 2 inches for small prints like 4x6 and 5x7, and 3 to 4 inches for large prints such as 16x20 or bigger.
What size mat do I need for an 8x10 photo?
A 2 to 2.5 inch border works well for an 8x10. The mat window should be about 7.5 x 9.5 inches so it overlaps the photo edges by roughly a quarter inch, and the mat board comes to around 12.5 x 14.5 inches before rounding to suit the frame.
How much should a mat overlap the photo?
About 0.25 inch (6 mm) on each side. This hides the print's edges and keeps the photo secure behind the window.
Should the bottom of the mat be wider?
Often, yes. Many framers make the bottom border 5 to 10 percent wider than the top and sides. This is called bottom weighting and it makes the photo look balanced and stable.
Is a wider mat always better?
No. A wider mat suits large prints and formal pieces, but on a small photo it can overwhelm the image. Scale the border to the size of the print and the frame.
Do I need a mat for photo framing in Dubai?
It is strongly recommended. A mat keeps the print from touching the glass, which helps prevent sticking and moisture marks in humid conditions, and it improves the look of the finished piece.
Can I choose a custom mat size when framing online?
Yes. With online photo framing in Dubai, you can usually enter your photo dimensions and select mat width, colour and frame style. Check the options on each service, such as PickFrames, before ordering.
What mat colour is best?
White or off-white is the safest choice for most photos and interiors. Ivory suits vintage and black-and-white prints, and black or grey can add contrast to bold images.
What is the difference between a single and a double mat?
A single mat has one layer of border. A double mat adds a second layer with a thin reveal showing beneath the first, which adds depth and a pop of colour.
Where can I get custom framing in Dubai?
You can get custom framing in Dubai from local framing studios or online providers like PickFrames, where you can design your frame, mat and glazing around your photo's exact size.